Thursday, August 9, 2012

Wednesday, August 8, 2012

August CKC Kit "Rebel Summer"

This month's inspiration is a wonderful digi kit from Scrap Orchard in tried & true all-American style.


Now I'm as much a patriot as the next gal but this kit presented me with two huge problems - don't have a lot of product that was reminiscent of it & no photos in my arsenal that seemed compatible either in story or feel! What's a counterfeiter to do?

Then I realized that I always start with the paper. Well, although I wasn't inspired by the color scheme, there was a really nice mix of patterns in this kit! Pattern I got :~)


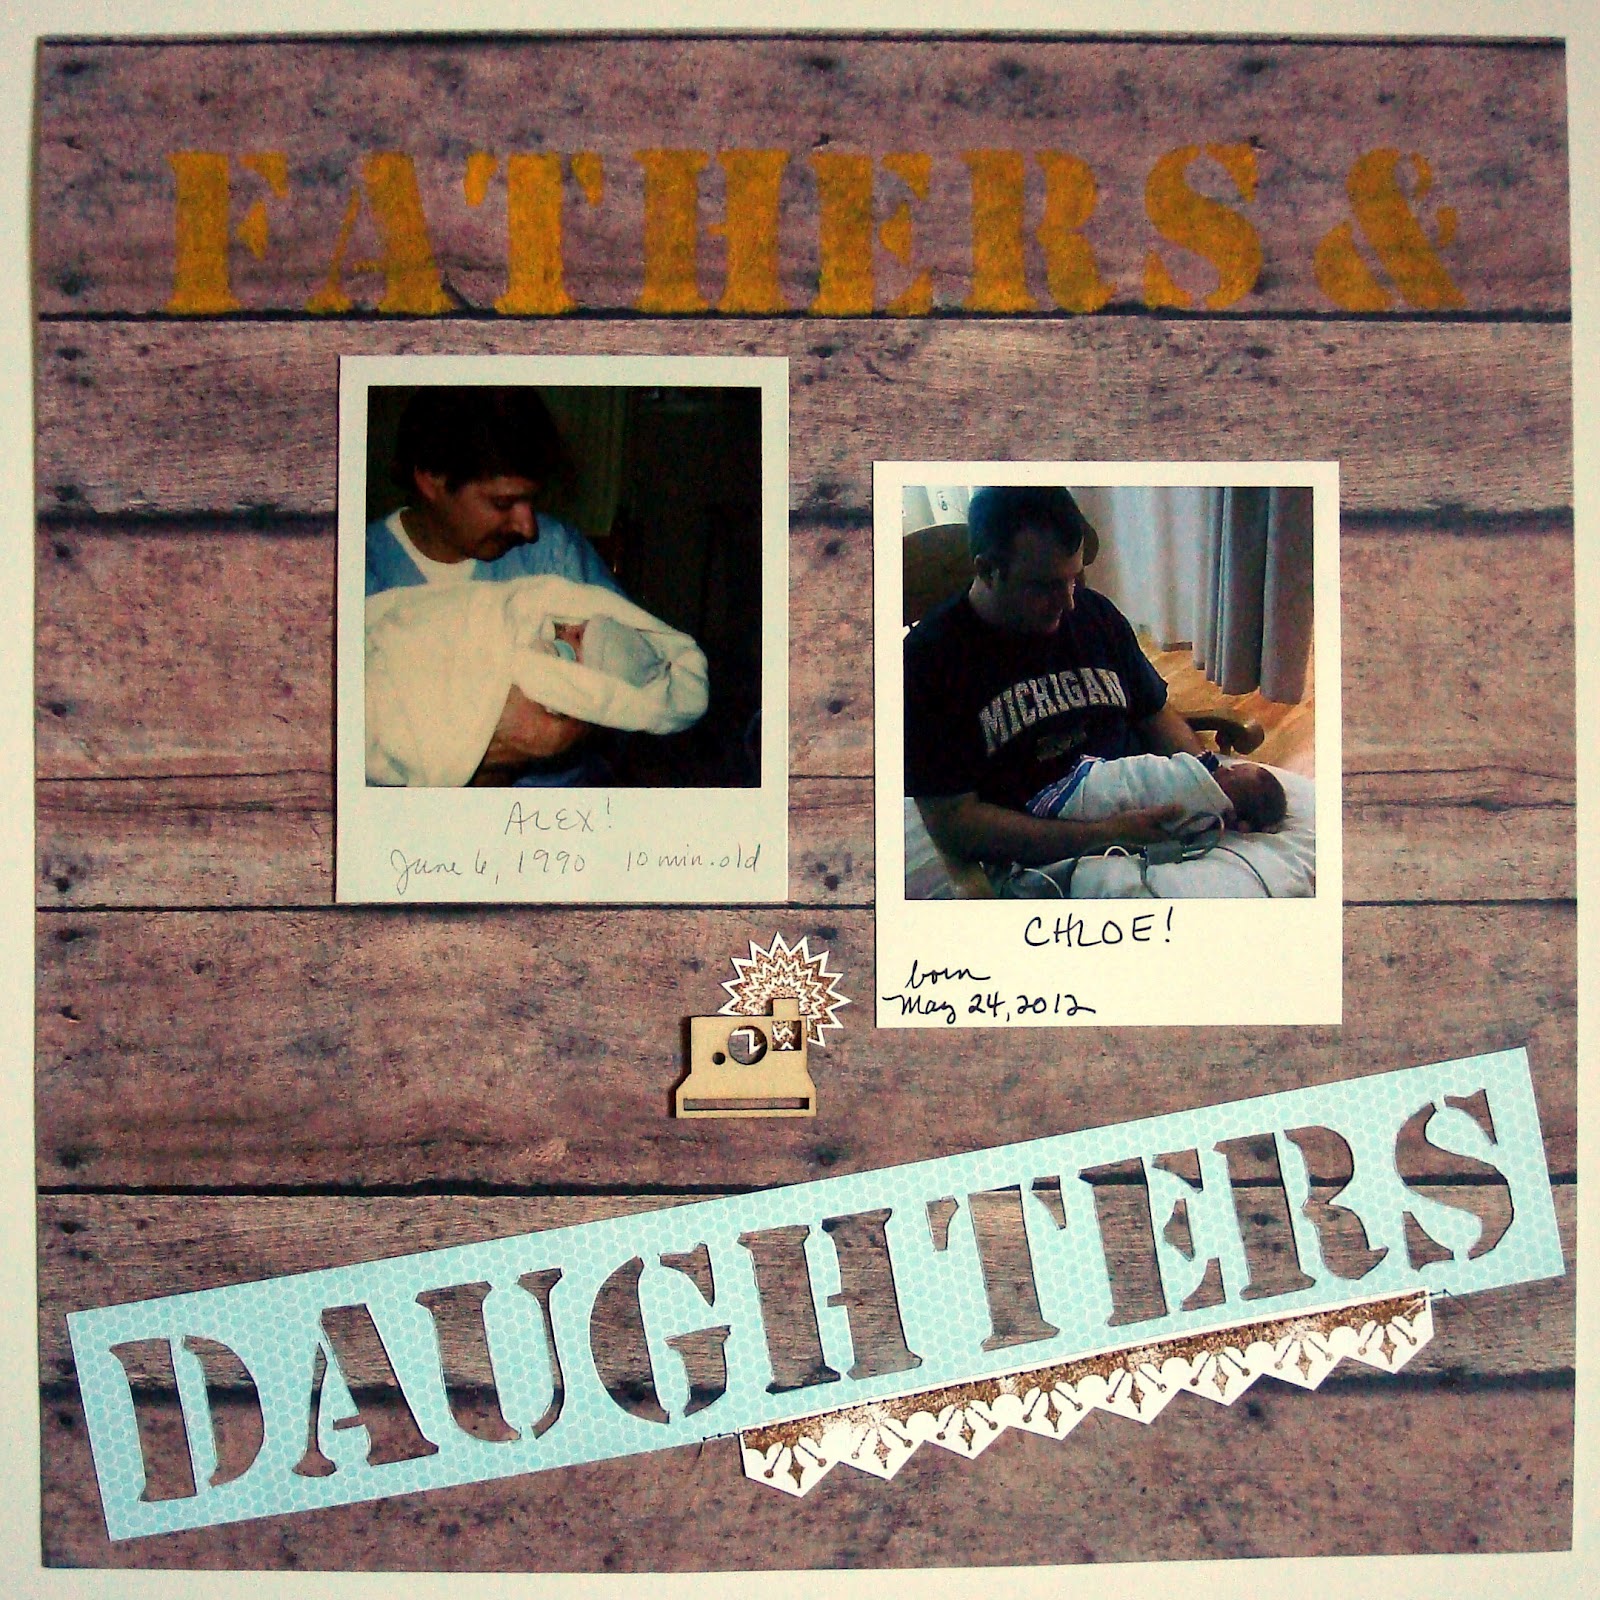
Gingham, small floral on dark background, hexagon, plaid (this is where I started), REBEL change-up from a grey suede textured paper, small (well...) floral on light background, lined paper, chevron, REBEL change-up from plain color, polka dot, stripe that reads like a corduroy texture to replace the denim, and  woodgrain (hehe)...

Fortunately for these middle-aged eyes a complete listing of all of the other components was provided. I decided to work closely with this list since I was already a rebel with the papers. Although a few items are awol (bicycles & fruit, for example, although I did include some felt), I am not ruling out making some pinwheels from scratch along the way!


If I had room I would love to keep this Configurations tray out all month just as you see it - I think it is inspiring. Some more bits & bobs below. I included b/w copies of the layouts from the inspiration kit page to break them down into sketches. Otherwise stickers, stamps, ribbons, flowers, stitch rub-ons & a yummy butterfly paper (someone mentioned butterflies being summery in their kit presentation & I totally lifted that idea) and I'm calling it good. Still need to choose some alphas, if I can remember where I put them in my newly organized scrapspace!

Monday, August 6, 2012

Bye-bye, Beachy Keen...

Can't believe it's time again to put together a new counterfeit kit. And this month my special scrappin' bestie, Lynnette, is the Guest Designer - how marvelous! Go take a look at her kit post here, it is blogging at it's best :~D

So this is the final farewell to my Beachy Keen July kit, which was a surprise in how enjoyable it was to stretch in new directions. I intentionally wanted to use black, white or kraft backgrounds this month and for the most part kept to that pinkie swear with myself. Here is layout #9:


When going through my magic blue box I discovered a few things that hadn't been used. These photos I had matched up early on with the vintage BG paper - tough to use it all up at once! I had really wanted to use the JB stencil paper throughout the month as a stencil so that it would be painted/spritzed/inky when I finally used it as paper on a page. It was perfect here as the title fit right in with the letters!


The JB medallion stamp was forlorn & inkless in the bottom of the box so out it came - the perfect thing to accent that G for the title. Here's a tip, though. When stamping on paper with cutouts you will have to stamp the image on both layers to ensure that your image is complete (grateful no permanent adhesive had been applied!) 

 And one last canvas embelli, using another stamp from the set - having those really encouraged me to think stamping but within a limited choice. All in all this kit ultimately turned out to be loads of fun!

Sunday, July 29, 2012

Scrapspace Part Deux

This is the first scrapspace I have had that had wall space. And oh! What a lot of things can be done with walls! Lots of inspiration out there but as I'd prefer to spend my money on scrap supplies, I have improvised.


Technically NOT wall space, but I never had a door, either! Pottery Barn - love the look of this & the idea of utilitizing that space but $60? I don't really even think shelves are what I need but it looks so cool! Found this over-the-door towel rack lonely & forgotten in my mudroom:


How perfect! I thought hanging was the way to go for packs of embellis and even considered a clear hanging shoe storage bag, but this can accommodate a variety of sizes & has a high visibility factor which I need. For me out of sight is out of mind which is why it is so important that I carefully consider what is on display.

This was where I started with this part:
Had thought I would love to have an inspiration board on this wall until I saw this:


This was REALLY my heart's desire, but at $150 (ouch!) I paused... This isn't exactly in the style of my  pretty little room but I really loved the idea of showcasing some inspiration in my space. An email from Michaels  & their cube storage system at 50% off looked pretty tempting! And it fit on my sideboard with room left for my Big Kick.


Next I will have to deal with the closet (cue ominous organ music) so that I have shelving for the bins that are still downstairs, and a space for my sewing machine to stay set up - perfect!


Stay tuned!

Wednesday, July 25, 2012

To my 18 year old self

I had some helpful inspiration for this ScrapHappy Cookbook prompt, which I've credited on my Flickr post. I started out with a figure on the phone from the 9 to 5 October Afternoon line to represent my current self and a vintage (wow - I am really that old...) photo for my 18 year old self.

I chose the Basic Gray Lauderdale 6x6 paper pack for a patchwork background as it reminds me of retro style. I tried to chose more chaotic papers for the early days (top right).


Next I wanted to use the Jenni Bowlin numbered paper but it was going to overpower everything so it had to get trimmed back.


Then I cut some arrows marked on the back of plain green Lauderdale paper, then made the raw chipboard telephone into a glossy black one by inking and adding Ranger Glossy Accents. Don't mind the bubbles - a label will be added later on top with the year (intended to look like the phone number).


A phone needs a cord, but this one is brown, not black. 
Ink pad to the rescue again!


Number one lesson I wish I'd known as an 18 year old?
Put GOD first. Everything else just follows from that.

Decided that sentiment needed a little more pizzazz so created a little crown style accent with one of my first scrapbooking purchases - fancy edge scissors! I think I bought a tub of them, lol. I am surprised how often these come in handy, though, to add just a little something extra to a mat.


Time for a snack :~)


Then sew down the paper patchwork & arrows.


And there you have it.
The advice I would give ANYONE, young or old.


Saturday, July 14, 2012

Stamped Canvas Doily Embelli

It's so fun to be inspired by the tutorials at CKC  which took me here. I couldn't tell you more perfectly the how-to than Julia Stainton does, but I can show you my process! Our kit this month included a package of Amy Tan American Crafts canvas stickers, so I tossed in a sheet of sticky backed canvas in the hope of stealing this cute product.  I liked the doily shape & just so happened to have purchased these recently:

Good Tip: this stamp is a great choice as the pattern is rather bold & the stamp is cut deep, as I will be using paint to print the design. The paint can get a bit smudgy if the image is too fine & fussy.

So I gathered my supplies...

I bought the pack of canvas a few years ago & haven't ever used it! The paint dabbers are Sunshine Yellow, Lettuce & Pool. I have an entire drawer of paint but the convenience of the dabbers is wonderful for this project. There are stand alone dabbers available that slip over your finger, I believe, and could be used with your existing paint stash. Note to self to look for those!

So I load the stamp with paint:


Good Tip: clean that paint off right away! I used a ratty old utility brush that I keep handy for just such a job.


Distress the edges - why bother with the canvas if you can't tell it's fabric?


And voila!
Here's how I used one:

on this layout:


Tuesday, July 10, 2012

3 New Pages

Well, I knew when I put this latest CKC kit together it was going to challenge me. By staying true to the inspiration kit from Citrus Twist I will be thinking outside my usual scrapping box - A LOT!

The whole beach theme reminded me of this story so I dug up the photos & started playing. I had purposefully put the wooden house & boat embellis in my kit for this page, but didn't know where I would go from there. The blue chevron simply begged to be water & that inspired the little vignette on the right & the washi tape grounded it nicely. The stamp set came in handy to dress up the faded 70s photos even though it took a little nerve! Some zigzag stitching to anchor the waves (pun intended, hehe) & that little bite of a border punch detail finished it off.

So last night I get the first layout finished & I am still in a scrappy mood. These pics were on my desk to do a companion layout to this page of me w/my elder daughter as an infant next to a pic of her w/my grandson as an infant, where we are almost in the same position. Well, this is my husband with our younger daughter & our new granddaughter with her daddy! The original was a Polaroid so I cropped the other to mimic the shape & added the wooden Polaroid camera shape - perfect! Then I used my stencil page & yellow dabber to make the first half of the title, then fussy cut the bottom using the stencil again. A quick stamp from the set made a lacy accent for the girlie part & it's good to go. I really like how this turned out :~)

This morning when I finished the 2nd layout I was STILL motivated to scrap, so I started searching through my kit for inspiration. I decided to use the  October Afternoon chipboard as a starting point so I pulled out a photo album of pics from when the girls were young & found these. Doesn't that bike work so well on here? Kept adding here & there until my industrial accident - it didn't occur to me to add the yellow paint splatters (or at least that's what they were supposed to be, lol) until after most of the page was down. They were a little blobby but I could've lived with that. Unfortunately, I kind of forgot that they were still wet when I turned the page over to punch the little hands out of the bottom...uh-oh... As I can't come up with any camouflage ideas they will remain to mock me forever (just kidding!)

Wish I didn't have to stop to do boring things like laundry & housework & caregiving, but real life goes on! Thanks for joining me in the process :~)