Saturday, July 14, 2012

Stamped Canvas Doily Embelli

It's so fun to be inspired by the tutorials at CKC  which took me here. I couldn't tell you more perfectly the how-to than Julia Stainton does, but I can show you my process! Our kit this month included a package of Amy Tan American Crafts canvas stickers, so I tossed in a sheet of sticky backed canvas in the hope of stealing this cute product.  I liked the doily shape & just so happened to have purchased these recently:

Good Tip: this stamp is a great choice as the pattern is rather bold & the stamp is cut deep, as I will be using paint to print the design. The paint can get a bit smudgy if the image is too fine & fussy.

So I gathered my supplies...

I bought the pack of canvas a few years ago & haven't ever used it! The paint dabbers are Sunshine Yellow, Lettuce & Pool. I have an entire drawer of paint but the convenience of the dabbers is wonderful for this project. There are stand alone dabbers available that slip over your finger, I believe, and could be used with your existing paint stash. Note to self to look for those!

So I load the stamp with paint:


Good Tip: clean that paint off right away! I used a ratty old utility brush that I keep handy for just such a job.


Distress the edges - why bother with the canvas if you can't tell it's fabric?


And voila!
Here's how I used one:

on this layout:


Tuesday, July 10, 2012

3 New Pages

Well, I knew when I put this latest CKC kit together it was going to challenge me. By staying true to the inspiration kit from Citrus Twist I will be thinking outside my usual scrapping box - A LOT!

The whole beach theme reminded me of this story so I dug up the photos & started playing. I had purposefully put the wooden house & boat embellis in my kit for this page, but didn't know where I would go from there. The blue chevron simply begged to be water & that inspired the little vignette on the right & the washi tape grounded it nicely. The stamp set came in handy to dress up the faded 70s photos even though it took a little nerve! Some zigzag stitching to anchor the waves (pun intended, hehe) & that little bite of a border punch detail finished it off.

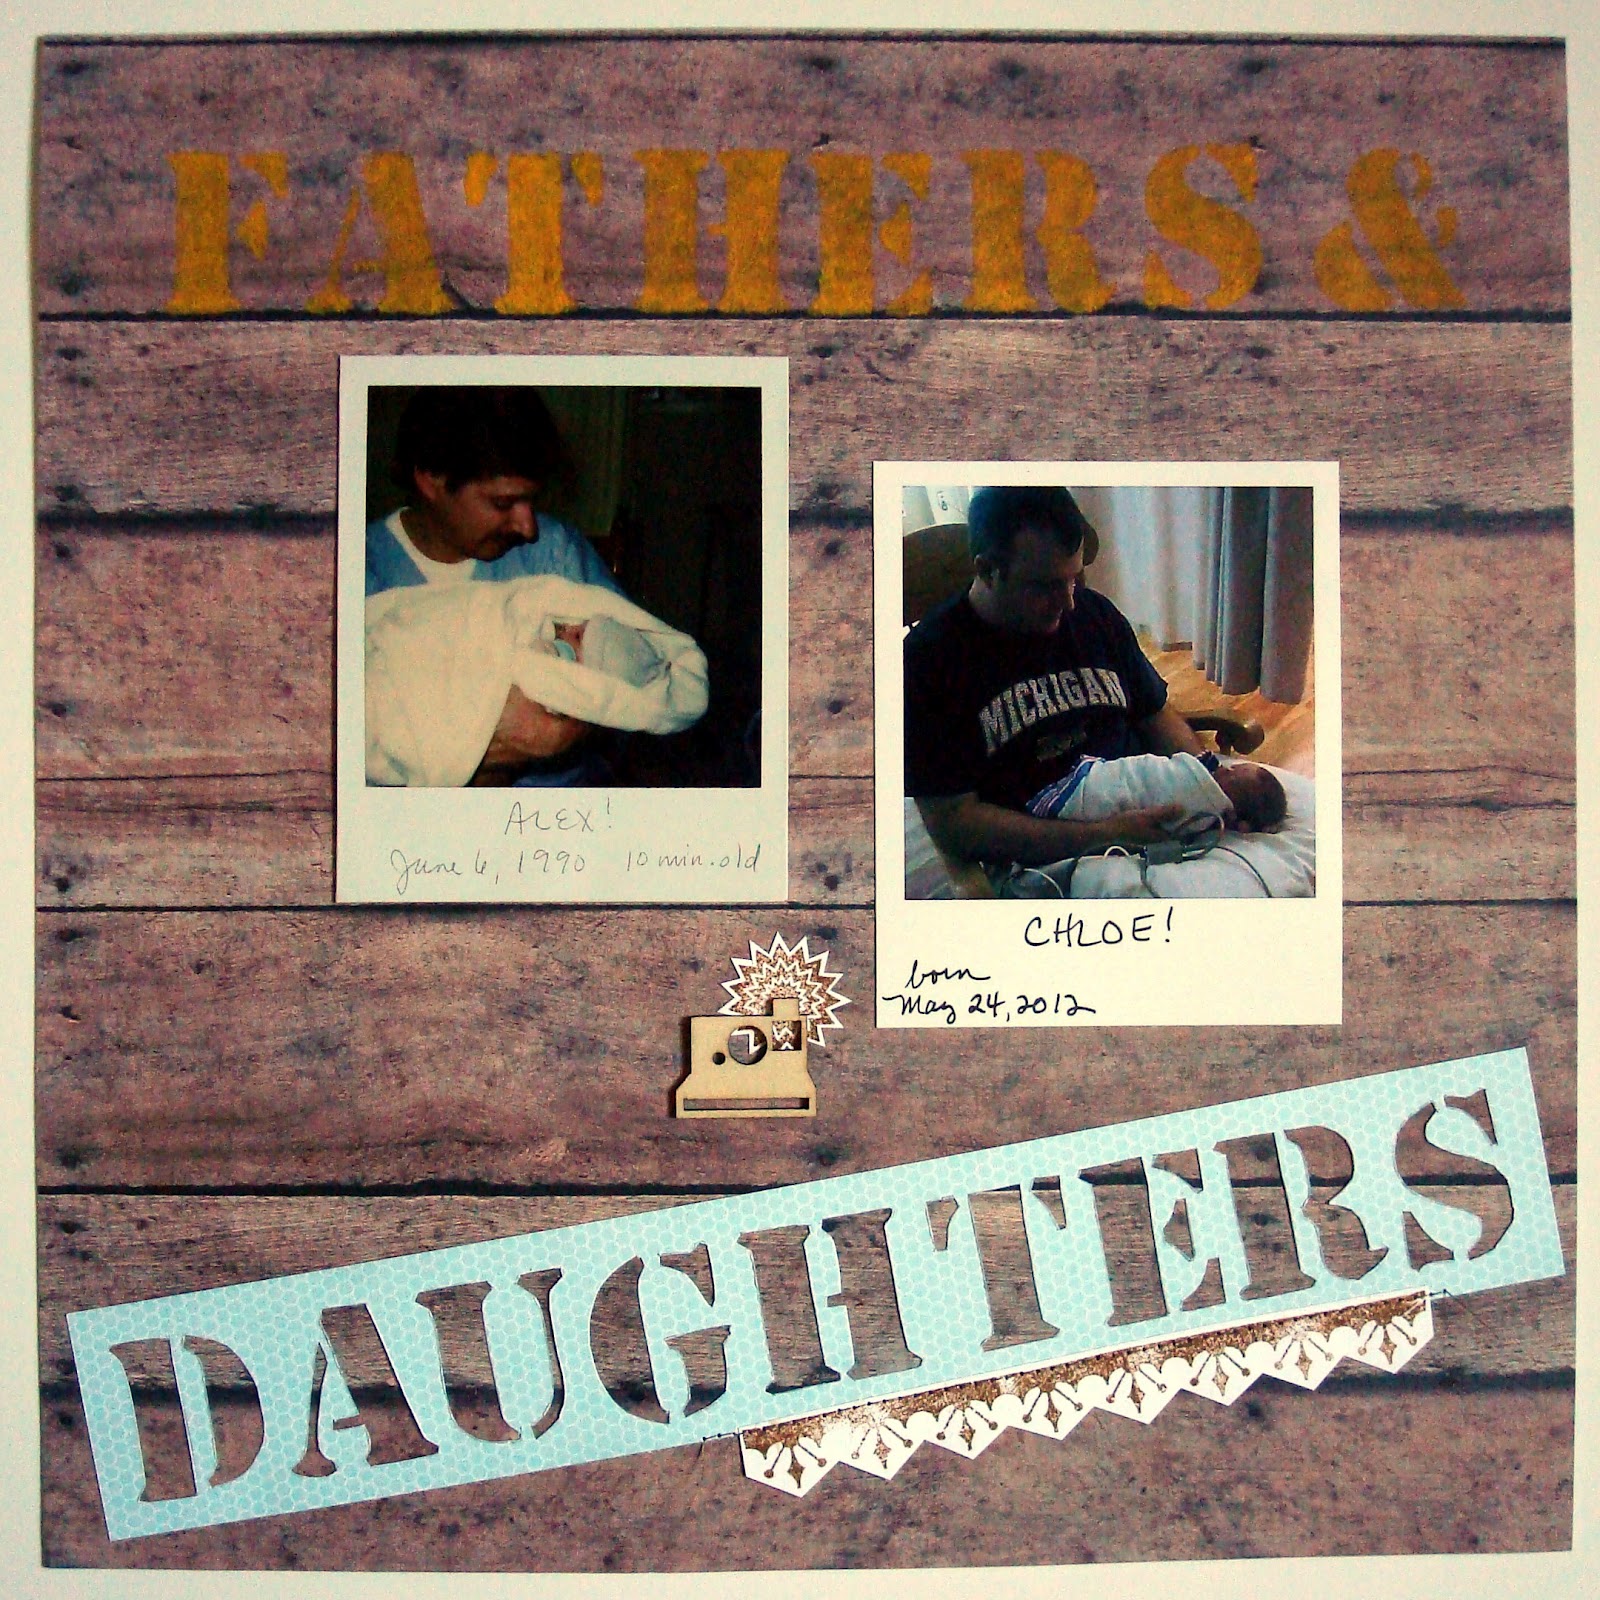
So last night I get the first layout finished & I am still in a scrappy mood. These pics were on my desk to do a companion layout to this page of me w/my elder daughter as an infant next to a pic of her w/my grandson as an infant, where we are almost in the same position. Well, this is my husband with our younger daughter & our new granddaughter with her daddy! The original was a Polaroid so I cropped the other to mimic the shape & added the wooden Polaroid camera shape - perfect! Then I used my stencil page & yellow dabber to make the first half of the title, then fussy cut the bottom using the stencil again. A quick stamp from the set made a lacy accent for the girlie part & it's good to go. I really like how this turned out :~)

This morning when I finished the 2nd layout I was STILL motivated to scrap, so I started searching through my kit for inspiration. I decided to use the  October Afternoon chipboard as a starting point so I pulled out a photo album of pics from when the girls were young & found these. Doesn't that bike work so well on here? Kept adding here & there until my industrial accident - it didn't occur to me to add the yellow paint splatters (or at least that's what they were supposed to be, lol) until after most of the page was down. They were a little blobby but I could've lived with that. Unfortunately, I kind of forgot that they were still wet when I turned the page over to punch the little hands out of the bottom...uh-oh... As I can't come up with any camouflage ideas they will remain to mock me forever (just kidding!)

Wish I didn't have to stop to do boring things like laundry & housework & caregiving, but real life goes on! Thanks for joining me in the process :~)

Sunday, July 8, 2012

Oh my Glitz!

I am utterly breathless with this new sneak peek from Glitz shown here. Take a look at this!

 Please visit them & look at all the details. If you are into vintage funky Glitz goodness this will absolutely knock your socks off - sorry - your seamed stockings, lol! And the link has a giveaway if you comment by July 20th!

Well? GET GOING!!!

CKC July Counterfeit Kit "Beachy Keen"

Very grateful to be able to jump on board this month again :~)  So here's what I gathered up based on the inspiration kit "Summer Boardwalk" from Citrus Twist seen here.


And here's the formal presentation of my kit,
 "Beachy Keen"
(haha - I love figuring out more little blogging goodies 
as I explore some of the editing features!)


When choosing my papers the first four are about as close to cardstock/neutral/plain as I can go. I did include a sheet of white card but all others are patterned. I have been wanting to use that Jenni Bowlin stencil paper that is peeking out at #2, so watch for that to make an appearance.  

I also went a little off the reservation on my bolder patterned papers in the bottom row, but I chose things that mimicked the inspiration kit either in style of pattern or in the case of the green & the polka dots I really just wanted something lighter & brighter instead of more chevrons. There is a chevron stamp in the indie chic stamp set which I happened to have, plus I just bought a chevron border punch so that will get used as well.
 Here's a closer look at some of the details:


I had the stamp set found in the kit, but decided to substitute the Tin Pins, Smash arrows & tabs for the antique off-white buttons & the conversation bubbles, the pack of Prima flowers for a single, and the JB stamp for fun! You can also get a better look at the bottom row of my papers, minus the wood pattern.


Subbed different button pack & chipboard for the fabric stickers. I know myself so multiple alphas were a must! And I continue to reach for those tiny word stickers - so easy to do myself but I just never think of it.

My teal floss turned into lime green, my yellow ribbon turned into Sunshine Yellow paint dabber, floral tape into teal diagonal striped washi tape, and I chose a larger variety of wooden accents. Okay - I confess. In the process of putting my kit together I already have some photos in mind so I got a little specific with a few of my goodies!


All goes into the magic blue box, which will be my go-to supply bin for the month! I feel like this month I made the kit more my own than ever by being inspired but not trying to directly copy the inspiration. Couldn't be easier to grab some photos & get started :~)

And on another little blogging note - 
I can't believe how much daytime photography improves my pics! 
Will have to remember to be patient about posting until I can "get the light."

Sunday, July 1, 2012

Inspiration Strikes in the Strangest Places!

Just getting a little snack last night...


Why DO I love this shape so much?
Must. Go. Scrap. This. Shape :~)


 Or perhaps a lift of the back of the box?
Totally L-O-V-E this!

Tuesday, June 26, 2012

Sorting Out My New Space

Well, a little history...
My scrap room was a delightful little sitting room just inside our front door. Lovely windows and the perfect size. Last summer my dear Aunie came to live with us after a series of hospitalizations, and my room made a perfect bedsitter for her. So I packed up (most) of my stash & moved over to the living room.
 
Not everyone liked the view... 

...and it was a little tough to scrap at night trying not to disturb anyone.

So when we brought her home from the hospital again a few weeks ago, 
we needed room for a hospital bed, and the scrap spot was the perfect place. 

I got to move on up to the little jewel bedroom I made out of Alex's room! 
The only drawback was the closet is already full.

Well, I'll have to get to that later, I guess! I'm planning to stow my sewing machine in here. In the meantime I've had to leave it downstairs :~(

We quickly got everything out of the way & upstairs. I decided on a floor plan & shifted the furniture, but it's a work in progress to sort & stow my stash so that it is available in a cohesive way. Little by little, day by day...

I am hoping to have an inspiration board the length of that wall to the left behind the door! (Did I forget to mention this is the first scrapspace I've had with walls?) Continuing clockwise in the room...

My cart full of paper is to the left of the table, and on the right tucked underneath are drawers that hold my adhesives, heat gun, Dymo, stamping stuff, with my paper cutter on top.

I spy Lynnette & Heidi's handiwork!

  Looks like room for another inspiration board! Or maybe some shelving...?
These bins hold stamps, scraps, paint supplies, washi tape, etc. I'll have to do a post about those. The slots at the bottom are sized for 12x12 bins and store cardstock/b&w/kraft paper, stencils, masks, and project bins. On top are my diecut machines, some Tim Holtz inking supplies and my blue bin for my CKC kit each month (alas, not this month)

 The stack to the left is all photos & the bin on the right is my alpha stash. The little table will have to go. I am thinking I will stack some bins in front of the mantel until I get the closet cleared.

Did I mention that the cat thinks this is HER room now, lol? I so love this chair! Will need to get my books & magazines moved up from Aunie's room. The piles are what I am sorting & sifting to be stowed in a more practical way.

And this is what's left in the hallway...

(mostly other papers & boxes of layouts)

 ...on/in the living room shelving...

(more supplies!!!)

...and a cabinet that remains downstairs for the time being

LOL - I was looking for that can of adhesive earlier!
Oh - and don't forget the sewing machine...

So I am trying to make little slices of time to not only organize & sift my stash, but also to SCRAP!


xo - Leslie

Tuesday, June 19, 2012

Much to be thankful for, much to pray for

I'm so grateful to report how well baby Chloe is doing! She weighs over 4 lbs & is off of all support of any kind - no feeding tube, IV or breathing help. She is a wonderful miracle gift from God.  Mom & Dad should be taking her home this week :~)

And when I am weak, He is strong. 


Our dear Aunie fell victim to a stroke the day after my last post... she has returned home to us after a week in hospital & we are doing our best to meet her needs. Sunday was her 90th birthday!


Hoping for a better birthday celebration next year...